Friday, February 25, 2011

Block-a-Palooza Block 10

I love this one so much I'm squeaking! By now you will not be surprised to see that I changed things up just a little bit, using six fabrics:

Thanks, Amy Ellis! And Philip Jacobs, who created the charming bird in the middle. I have a measly FQ of this fabric*, and almost couldn't bear to cut into it. 

These colors together are so delicious, I want to make a whole quilt from them. There was a time when I  thought grey was always and forever boring, but I'm learning to love it with the right playmates.

* What's that? You remember seeing a very similar print here in a fabric post somewhen? Ahem, yes, I do have more than two yards of "summer tree" in the turquoise colorway. So it's not like I'm starving for it. Today, though, I am grooving on the grey version, and I want more.

Tuesday, February 22, 2011

Block-a-palooza Block 9

Block 9, from Scott at Blue Nickel Studios, is called "Lemonade Stand" and it's a doozy. I cringed when I saw those tiny geese in the center, but it's worth playing with the teeny pieces:
Rummaging around in the scrap piles (my large scraps used to be in a bin, but are now in heaps all over my sewing room; these blocks keep coming before I can clean up), I found a piece of Heather Bailey print perfect for fussy cutting corners. Once I committed to that, throwing the other HB candy-colored prints in the mix was a must.

The geese got into quite a state at all the excitement and insisted on fleeing the scene, so they are facing out, rather than swirling around the center. I don't blame them. I'm calling this one "explosion at the candy factory."

My inner four-year-old loves these prints, but they are so young and sugary sweet they've never fit in well with the rest of my stash. This block was fun to throw together, but it's making my teeth ache. If I'm going to go over-the-top/off-the-deep-end (as has been known to happen) I prefer a more grown-up goofiness.

Like this:

This is the "by the rules one," planned around using the last of an old Kaffe Fassett charm pack for those corner squares. I'd already trimmed these long ago to 4" for something they never got used for (don't remember what), so reducing them to 3.5 didn't seem like a big deal. I hadn't used the dots in a few blocks, and they were feeling neglected, so they got to join in the fun, too.

I wish now that I'd squared up the 9-patch center unit before adding the sides, as it is clearly not square, but I was tired and hungry and impatient and just wanted to get it done. No chance I'll go back and redo it, so I'm crossing my fingers it will look fine once quilted.

BTW: I made all the geese for these two blocks the "wasteful" way: sewing a diagonal across 1.5" squares on top of a 1.5"x2" rectangle and trimming the extra. Which is way too tiny to make HSTs from, and a few square inches of fabric, total, so hardly a big waste. No way I was going to follow the instructions, which assumed a higher tolerance for lining up and sewing (accurately! without stretching!) little bias edges than I will ever have. The squares were so small I didn't even bother penciling in the seam lines, just eye-balled it.

Block-a-Palooza Block 8

It's in the mosaics, but I forgot to post a bigger pic of my completed 'palooza Block 8, a basket of geese by Angela Yosten (originally, as usual I took some liberties). Mine looks like this:

The center basket is machine appliqued using "wonder-under" fusible to hold everything in place. This was my first time doing machine applique, which just happens to be an item on my "new sewing things to try in 2011" list, so it was fun to get to do that on a 'palooza block.

Angela's block uses bigger "geese" for the handle. I cut mine in half, and used more of them. I also added the little circle at center top, and the little red feet for the basket. I also used a very small zigzag stitch instead of a blanket stitch to nail all the applique bits in place. My machine's blanket stitch, which I have not used before, and tested on a scrap, is a doubled stitch that looks impressively like a (very tidy) stitch hand-sewn with perle cotton. It's a nice effect, and I look forward to using it on a future project someday, but was not the look I wanted here.

The hardest part of this block was peeling the *&$^#%@! paper backing off the fused wonder-under. I have fingernails and know how to use them. Usually I am the person who can coax a stubborn backing off something when all others around me have failed. But not this time.

I followed the Pellon instructions to press the rough side of the fusible onto the backside of the fabric "for 5-8 seconds with a hot, dry iron." My sister, when I moaned about the peel-off hassle to her, said that sounded like way longer than necessary. It's also possible that Pellon had in mind sewists using cheap-o, wimpy irons, not a super-dang-duper high-tech iron, which is what I roll with. Mine gets really hot. Next time I will fuse as briefly as possible, on a lower setting, and hope the paper puts up less of a fight.

I used a total of 4 new prints in this block, and expect they will all make repeat appeances before the 'palooza fun is over.

Saturday, February 19, 2011

My Block 7 how-to

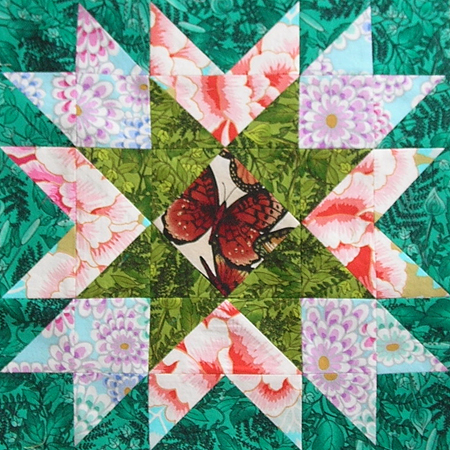
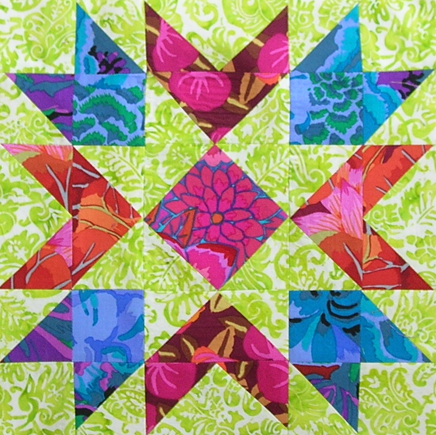
Here's a quickie tute for anyone who wants to make their own alternative 'palooza Block 7, like this one:

First, select five fabrics from your stash. You will need:
  • 1 MEDIUM PRINT with low contrast for the edge pieces: 4 8.5" x 2.5" pieces
  • 2 PRINTS for the "geese"; one DARK, one LIGHT. From each print: 4 2.5" squares; 4 4.5" x 2.5" rectangles
  • 2 contrasting SOLIDS for the corners that pick up colors from the prints. From each solid: 4 2-7/8" squares

Pair up the solids and make your corner half-square triangles by drawing a diagonal line (I use a mechanical pencil) and sewing 1/4" on either side:
Cut apart along the pencil line, and press your seams. I always press my seams open (the seams lie flatter than way, and it's much easier to match up points), but if you're a side-presser do it your way. Set your HSTs aside while you prepare the Geese units.
 
Take 2 of your LIGHT print 4.5"x2.5" rectangles and pair up with 4 of the DARK print 2.5" squares. Pair 2 of the DARK print 4.5"x2.5" rectangles with 4 of the LIGHT print 2.5" squares. Make these sets into four Flying Geese units by sewing on the square's diagonal, just as you have for previous blocks.
 
BTW: If you are making little extra HSTs out of the goose trimmings, sew 1/2" away from the first seam (toward the outside corner) and cut between the two seam lines. It's easier to make those little HSTs now than to pair up and sew tiny triangles later. I draw the second seam line at the same time I do the first one, and sew them both then snip apart before doing the other side of the goose.

Finish up your four goose units. The extra four rectangles go together to make the center. Place your 2 LIGHT rectangles face down and measure in 2" from each corner on one side and mark that spot with a pencil. Then draw a diagonal line to the farther corner from each mark. You'll make a little "X" at the center of one side where the seam lines cross:
Pair up your LIGHT and DARK rectangles right sides together and sew ONE corner seam on each pair (sew two right corners or two left ones, doesn't matter, but be sure to sew the SAME corner on each pair). Trim and press. Make two of these:
Now place these units right sides together, matching the seams. (It's a good idea to use pins here, to keep everything nicely lined up. I rarely pin anything, but you might want to.) With your ruler, line up on the light-side pencil line and extend it across the dark end. Sew up that seam, and trim the corners. (Somehow I did not manage a pic of that step, sorry). Press open.You'll end up with a quarter-square triangle unit for the center of the block:
Yes, you could just cut a larger square of each fabric, slice on the diagonal, sew up and trim... but then you wouldn't have more little extra HSTs like the ones you make from the other geese to add to the pile, which is entirely why I did mine this way.

Okay, all the bits are done, now we just have to sew them together. Add a goose unit to each side of the center (light to dark, or dark to light, doesn't matter), and a HST unit to each side of the other two geese units. Line them all up in orderwith an edge piece on either side, and sew the seams:
Sew the other HST units to either end of the other two sides (make sure you get the colors in the right place), and sew up those seams and you're done.

Keep in mind it's easier to get sharp points and neatly aligned corners if you press your seams open. Here I'm adding one of the the side geese to the center unit, using my 1/4" foot. With the seam pressed open I can see exactly where the tip of the goose is, no guessing:
The best thing you can do for your sewing is to invest in a really good iron. Good heat and a lot of steam will help those bulky seam allowances stay open. (And if you prewash all your fabric, as I do, you can press with as much heat and steam as you want or need, without concern that the fabric might shrink.)


'Palooza Mid-Way RoundUp & a Sneak Peak

We're halfway through the Block-a-Palooza quilt-along. Here are all the blocks I've made so far. Way more than the requried 8, 'cause I couldn't resist making more than one of some of them:
Half-way-point giveaway chances have been promised to all who post proof they've been diligently sewing along, so I figured it was time to find out how to make these cool photo mosaics. Turns out it's easy-peasy right here. Just link to your Flickr acct and insert your pics.
This is the core group of blocks. They each feature the little green leaf print, a different solid (or two), and at least one print not seen in previous blocks. My original plan was to use these for the "real" 'palooza quilt, and do something else with the others. But anything could happen. I may mix and match when the time comes. Chances that I will follow the prescribed 'palooza layout (as yet unknown) are slim, given that my brain thinks "instructions" are mere suggestions to be modified, embellished, or discarded at will.

In addition to quilt-along fun, I've also been working on a semi-secret project. This is for the Modern Quilt Guild Monochrome Challenge, and I won't be ready to show it off for a while yet, but here's a teeny preview. It started out with a whole lot of this, because I happen to have a lot of greens in the stash:
And now features a lot of this:
The brighter parts are all done. This weekend I'll be getting as much of the darker sections completed as I can. I'm making it up as I go along, so it's hard to say how much more work/time will go into it, but I think I'm on-track to make the March 31 deadline without too much stress.

This may be too "art-quilty" by the time it's done to appeal to a "modern" judge, but I like how it's turning out enough to finish it, regardless of how modern it does or doesn't look, or whether or not making the deadline remains feasible.

Wednesday, February 16, 2011

My Own 'Palooza Block 7

I'm sure there are Block-a-Palooza participants grateful for Heather's easy, simple Block 7, but it was too easy and simple to interest me. So I used it as the basis to design my own block.

Starting with Heather's concept of a large 9-patch with 4-patches in the corners and center...
I then,
1) removed the center 4-patch:
2) added corner-to-corner diagonals:
3) added flying geese around the center:
4) removed a couple of seams from each side:
Selected fabrics following my rules and voila, a new 'palooza block that's all me. Or as much "all me" as any grid-based block design can be. There are a zillion and one variations on this kind of block, and they've all be done by someone, somewhen. Shouldn't stop you from playing around on your own, though, because it's fun.

If you'd like specific instructions on how to make this block for yourself, let me know in the comments, and I'll share my constructions notes and some pics in a new post.

* * * * * *
UPDATE: Instructions for this block are now available here.

Saturday, February 12, 2011

Block-a-Palooza Block 6

Block 6 joins the fun courtesy of the Happy Zombie. My first rendition adheres to my self-imposed fabric guidelines (new solid and one new print each block; repeat the green leaf print in every block), and turned out very well:
That's the last of the purple stripe, BTW, so I'll have to come up with something equally fun (from stash, of course) for the next ones. Now that I've got six blocks done from these guidelines, the blocks are starting to look more cohesive. This one, especially, helps the first two blocks play well with the others.

Meanwhile, the pile of "outliers" (anything goes versions, not required to socialize unless they want to) is growing. I made two extras of this block, because I wanted to experiment with light vs. dark backgrounds. I did a dark-background one first, with pleasing though not spectacular result:
I've been itching to include a piece of that butterfly fabric somewhere, but with dark b'flies on an ivory background it's a tricky fabric to use. It's okay here, but will be better in larger pieces somewhere else.

This light background one might be my favorite, in spite of my needing a couple time-outs during construction. I repeated the background fabric around the center so the "arrows" would pop more:
This one gave me more trouble than all my other 'palooza blocks combined. Partly due to user error: I sewed in one big unit backwards. Twice. Plus, in spite of what I thought was my usual care in cutting and seaming, nothing about this block wanted to stay square or line up. The fact that it turned out square in the end, and most (not all) points seem compliant, is due to forceful and repeated use of a hot steam iron and an uncharacteristic (for me) willingness to rip out and redo a few inches of seam here and there as necessary. I even used a  pin in one spot! Folks, when I resort to using a pin, even just one, you know things are in a bad way .

I'm very glad it's only early afternoon on Saturday, because I need a day off before the next block goes "live" on Monday.

Plus, I have a secret project up on the design wall that I'd like to work on this afternoon. Don't worry, it won't be a secret forever. I'll show it off in a few weeks when it's further along. I'm also working on a pieced border for the purple and green OBW. That doesn't look like anything but a huge pile of scraps right now.

Wednesday, February 9, 2011

Block-a-Palooza Block 5

That's a lot of little geese:
This block is all about the border, so for the central 9-patch I choose a "light" and "dark" with similar medium tones that blur the seam lines a little. The dark squares look almost fussy cut, but are not: I cut them from scraps left over from fussy cutting my first Block 3, and did not fuss over them.

Wanted to incorporate a solid light blue, and discovered I had 4 FQ or smaller pieces of very close but slightly different blues, so I used all of them.

My rows of border geese turn at the edges of the 9-patch, rather than at the edges of the block, as patterned. I made half the geese from the little green leaf print I'm using in every block, and then picked three other prints (repeated from this Block 4) for the rest of the flock. I wanted the magenta geese to be at the head of their row on each side, but didn't like the effect of having them out at the edge. Here they keep movement in the block turning around the center, instead of flying off the edges.

Miss Print did a lovely job designing this block, but I think one of this one will do for me. For now.

Monday, February 7, 2011

I won!

... the January Amy Butler Style Stitches Sew Along fabric giveaway!

Seems only fitting that I use these for future AmyB sewalong projects if I can match these prints (AmyB Geisha Fans, and Alexander Henry Abstract) to good bag choices:


The Alex.Henry abstract will be a challenge, but I'm up for it. As soon as I've earned a longer break by getting some "real work" (vs. fabric fondling) done, I'm going to make a cup of tea and sit down with the book and daydream about the possibilities.

Thanks SewAlong organizer Bree, and Jan. sponsor SewSweetness!

Sunday, February 6, 2011

Block-a-Palooza Block 3 Revisited

Better camera luck today. Here are the two new versions of 'palooza Block 3 I sewed up yesterday. I love the bluey-greeny deliciousness of this one...

... and the pow! factor of this one: 

They both go well with Block 4, version 1. Here are my 'palooza "outliers" so far:

Block 5 goes "live" tomorrow. Maybe I'll get another outlier from that one, too.

Block-a-Palooza Block 4

I'm happy to report that my machine is back from the spa and purring along "like buttah." I sat down yesterday to sew up some of the piece sets I'd cut earlier in the week. Here's Block-a-palooza Block 4. (Design by the talented Cherri at Cherry House Quilts)
This pinwheel block features my current favorite fabric, the lime on white batik, which I've had since last year sometime, a more recent purchase (the Philip Jacobs coral print framing strips) and a Bird of Paradise print that's been in my stash for at least five years. The corner squares are all Kaffe Fassett prints from the scrap drawer. I love how this block turned out. It's very "me."

I haven't entirely given up, though, on following the tone set by Blocks 1&2 and the fabric guidelines I came up with to (fingers crossed) ensure some kind of balance between variation and consistency across the 16 blocks I'll end up with by the end of this journey.

Block 4 above does repeat a couple prints from earlier blocks (in the corners), and bring new ones in, but does not include a solid. And, as you know, I've earmarked a certain purple stripe for more "geese" (or, in this case, their close cousin, the pinwheel). Plus, I'm really liking the little green leaf print I've used in all 3 previous blocks, so I've added "include the little green leaf print in every block" to my 'palooza self-challenge.

So I made a second Block 4:
I'm not as excited by this one, but since I was aiming for a transition block (in terms of color intensity and style) between Blocks 1&2 and Block 3, it turned out perfectly. It does a very good job of pulling this set of blocks together. With Block 4 in the picture, Block 3 (upper right) feels more like a member of the family:
I also made a couple more Block 3s just for fun (including my wildest block yet!), but they refused to be photographed yesterday, so I'll have to try again in a little bit when the light is better.

My sister rightly asked "how many 'palooza quilts are you making?" to which the answer is still "one." Probably. I do expect to collect extra blocks along the way, but it's too soon to say what I'll do with them. I might have enough for a second quilt top, or they might end up as pillows.

Thursday, February 3, 2011

Block-a-Palooza: a new direction

My sewing machine is still at the spa, so unless I undertake handsewing (no thanks, the ongoing hexies project provides enough of that) completion of Block-a-Palooza Block #4 will have to wait. I picked some fabrics for it, though, because a day without fabric fondling is like a day without sunshine:
I'm not sure I'll love the top one, although I''m confident it will be plenty nice enough to use. I want to keep open the option of including one solid and the green/blue little leaf print in each block, so the top row selection will satisfy that criteria, should I decide to stick with it to the end.

But I'm branching out into some wilder combos that are more "me." As much as I love my Block 3, it's brighter and bolder than my Blocks 1 & 2. So I thought maybe I'd make at least one more of those two, in a more muted (for me) fabric range, to fit better with the first two.

It didn't go well. My "more sedate" fabric combos came out like this:

Do those look tame to you?

Clearly my muse has spoken and there's only one thing to do: go back and make bolder versions of Blocks 1 & 2. I'm not especially eager to do that, but if I don't get my machine back soon I'll go ahead and cut some pieces for those just to keep myself entertained until sewing can begin again.

Tuesday, February 1, 2011

Sitting this one out

I dropped my sewing machine off at the BabyLock dealer for servicing yesterday, which means all active sewing steps on various works in progress are on hold. That makes this a good time to fondle my stash and cut more of it up.

I thought I'd get started on February's project for the Style Stitches Sew-Along: the Reversible Everyday Shopper.
I like the reversible idea a lot. I like the one big pocket either-side-out thing. But once again this bag is huge: a whopping 19" high, 16" wide at the base/13" at the top, and over 5" wide. Fill that baby up and carry it around for a while and you'll be crying for a chiropractor. And Amy, sorry, but I don't much like the shape or proportions of this one, something that you usually do so well.

This seems like a good choice for mothers of multiple young children who need to carry several bushels of what-have-you around every day, and who are fit enough for pack-horse duty. I'm reasonably fit, but don't have young kids or any need to carry vast quantities of personal items with me much of the time. Nevertheless, the "sew your way through the book" appeal is strong, and as you know I have no qualms about shrinking a pattern, so I was on the fence about this... until I googled the bag and read this post . Check out those real-world photos.That's huge!
It's not that we don't use tote bags, and large ones. We do. We carry home vast quantities of local produce from the Hilo farmer's market every week, and do most of the rest of our shopping at health food stores that have bring-your-own-bag policies. So we do use market totes. Lots of them. I did a quick count and found 12 errands bags for a two-person household, and there's probably another one or two in the car.

All that aside,what really stopped me was the lack of a good fabric pairing for this one. It's made of home dec fabric, of which I have some lovely pieces in the stash. What I don't have is two lovely pieces that look good together. So I'd either have to shop for fabric (nixed by my "make it from stash" vow), or make the bag from a single fabric.

I'd be willing to do that if I loved it enough to use some of my lovely stash fabric on it, but I don't. Or if I needed another tote, which I don't. Or if I could think of a friend or family member to gift the finished item to, but everyone I know is already weighed down with more totes than they have use for. Except possibly my Mom, but she's in her 70s and giving her a bag this size could consitite elder abuse.

So I'm going to sit this month out. It's not like I need to make another bag just for the fun of it. I've got plenty of goodies-in-progress in the sewing room to keep me busy. And I might jump ahead to April and get started on the Checkbook Cover, which I really do need. It's a nice one:
 ... but again, bigger than necessary.
I have multiple checkbooks for our various business and personal accounts, and I want them to look nice while taking up as little space as possible. So this pattern, too, is heading for modification.