I dropped my sewing machine off at the BabyLock dealer for servicing yesterday, which means all active sewing steps on various works in progress are on hold. That makes this a good time to fondle my stash and cut more of it up.
I thought I'd get started on February's project for the Style Stitches Sew-Along: the Reversible Everyday Shopper.
I like the reversible idea a lot. I like the one big pocket either-side-out thing. But once again this bag is huge: a whopping 19" high, 16" wide at the base/13" at the top, and over 5" wide. Fill that baby up and carry it around for a while and you'll be crying for a chiropractor. And Amy, sorry, but I don't much like the shape or proportions of this one, something that you usually do so well.
This seems like a good choice for mothers of multiple young children who need to carry several bushels of what-have-you around every day, and who are fit enough for pack-horse duty. I'm reasonably fit, but don't have young kids or any need to carry vast quantities of personal items with me much of the time. Nevertheless, the "sew your way through the book" appeal is strong, and as you know I have no qualms about shrinking a pattern, so I was on the fence about this... until I googled the bag and read this post . Check out those real-world photos.That's huge!
It's not that we don't use tote bags, and large ones. We do. We carry home vast quantities of local produce from the Hilo farmer's market every week, and do most of the rest of our shopping at health food stores that have bring-your-own-bag policies. So we do use market totes. Lots of them. I did a quick count and found 12 errands bags for a two-person household, and there's probably another one or two in the car.
All that aside,what really stopped me was the lack of a good fabric pairing for this one. It's made of home dec fabric, of which I have some lovely pieces in the stash. What I don't have is two lovely pieces that look good together. So I'd either have to shop for fabric (nixed by my "make it from stash" vow), or make the bag from a single fabric.
I'd be willing to do that if I loved it enough to use some of my lovely stash fabric on it, but I don't. Or if I needed another tote, which I don't. Or if I could think of a friend or family member to gift the finished item to, but everyone I know is already weighed down with more totes than they have use for. Except possibly my Mom, but she's in her 70s and giving her a bag this size could consitite elder abuse.
So I'm going to sit this month out. It's not like I need to make another bag just for the fun of it. I've got plenty of goodies-in-progress in the sewing room to keep me busy. And I might jump ahead to April and get started on the Checkbook Cover, which I really do need. It's a nice one:
... but again, bigger than necessary.
I have multiple checkbooks for our various business and personal accounts, and I want them to look nice while taking up as little space as possible. So this pattern, too, is heading for modification.
Showing posts with label sew along. Show all posts
Tuesday, February 1, 2011
Friday, January 28, 2011
The Bag that Broke My Machine
My "Cosmo" Bag (January's kick-off to a year of Amy Butler accessories) is finally done, and I'm about done in.
Folks, making my own jeans -- which I did last year -- was easier than making this bag! Amy, honey, I love your style, I love your fabrics, I love your books, but you are insane to rate this one "easy."
Maybe that's partly because I reduced the pattern at 78%, so the inside handle curve is smaller and less maneuverable. (Worth it, for a bag that will be more everyday useful to me; I don't need a gigundo one very often.) But maybe not. Amy's instructions sometimes seem to be written for ease of explanation more than than for ease of construction. I may not be the most expert or experienced seamstress on the block, but I'm not new at this. I have a reasonable skill set to draw on. Even so, the final steps of this bag kicked my butt.
And messed up my machine.
I was doing the final edge-stitching along the inside handle curve -- with just six more inches of stitching to do before all that remained was hand-sewing the button -- and as we climbed a mountainous pileup of interfaced seams at the corner of the band, something made an ominous popping sound.
I thought I'd broken the needle, but it's okay. I was able to finish stitching, and all's well visually: no horrific nest on the bobbin side. But now there's this kind of swishy sound with each stitch, which means something got knocked out of alignment.
First I'll try replacing the needle (I'd planned to switch to a new one after this project anyway), in hopes that the problem is a slightly bent needle. If that's not it, I'll be taking my stalwart friend in for servicing. At least I'll have a pretty bag to tote along as I drive to the BabyLock dealer. Here's the inside:
Finished dimensions of this one are...
Width at the base: 11"
Across the widest part: 15"
Depth at the base: 4"
Depth at the top: 3"
Height to top edge of center band (at the middle, above the button): 10.5"
Height with handles: 20"
Oh, and I added a piece of heavyweight box board to the bottom, for stability. I slipped it in between bag and lining before completing the final (gruelling) step of sewing the inside handle edges together.
For those just tuning in to this project, here are my comments on:
Binding the pocket edges
Doing the center band my way
Taking a few liberties with the lining
The true test of this bag will come when I use it. I think I will like it, but no way will I make it again until enough time has passed that I've forgotten how tedious fusing all the interfacing was -- or until little elves show up to do that sort of thing for me and to erase from memory the trickiest and most irksome bits.
If you're a beginning sewer and tempted by this bag, just put the book down and walk away. Start with something simpler like the Birdie Sling before tackling this one.
Tuesday, January 25, 2011
Cosmo Bag - Lining Details
I took a few minutes away from desk stuff this morning to get the main lining pieces for the Cosmo Bag ready to assemble. As usual, I did a few things differently, and thought I'd share those details at the flat stage, while they are easy to photograph:
Changes:
1) As you can see, I added a band detail to the center top of the lining (Amy's version has this piece only on the outside). This is purely decorative. I cut two "band" pieces (one for each side of the lining) from the lining trim fabric. They are not interfaced. I stay-stitched a generous 1/4" inside the bottom curve, then notched the seam allowance* and pressed to the back. The bands are placed on top of each lining piece, with upper raw edges even, then edge stitched along the bottom to hold in place. I also ran a line of stitching just inside the top edge to keep that from shifting when I put the entire bag together.
* If you're just tuning in, you should know that I am making a smaller version of this bag, having reduced all the pattern pieces at 78% on our copier. This reduces the seam allowance, too, so while Amy's instructions call for 1/2" seams, I'm using a 3/8" seam throughout. For a full-size bag, the stay-stitching should be at 3/8", not 1/4" from the edge.
2) I'm using the lining trim print for the interior side of handles (exterior fabrics can be seen here).
3) I cut the pocket for this side of the lining about an inch shorter than the other one. These are deep pockets, and I thought having one side a bit shallower might be useful. On the other side I added a line of stitching in the center to divide into two equal-sized pockets. On this side I moved that line to the side (it didn't show in the pic, so that's indicated by the bright yellow line), for one bigger and one smaller pocket.
On a full-size bag this larger pocket would probably be too big, and I'd most likely have dividing one side into two and the other side into three pockets.
4) I added a fake tag from a scrap of red fabric, purely for fun. I'd say I do this on everything I sew, but truth is I often forget. I'm glad I remembered this time, because it will make me happy each time I see it. Plus, sometimes it's useful to tell one side of a bag (or garment) from the other at a glance.
So that's where I'm at with this as of this morning. I might get to assembling the lining this afternoon, but that's not a sure thing. I'll show off the completed bag as soon as it's done.
Changes:
1) As you can see, I added a band detail to the center top of the lining (Amy's version has this piece only on the outside). This is purely decorative. I cut two "band" pieces (one for each side of the lining) from the lining trim fabric. They are not interfaced. I stay-stitched a generous 1/4" inside the bottom curve, then notched the seam allowance* and pressed to the back. The bands are placed on top of each lining piece, with upper raw edges even, then edge stitched along the bottom to hold in place. I also ran a line of stitching just inside the top edge to keep that from shifting when I put the entire bag together.
* If you're just tuning in, you should know that I am making a smaller version of this bag, having reduced all the pattern pieces at 78% on our copier. This reduces the seam allowance, too, so while Amy's instructions call for 1/2" seams, I'm using a 3/8" seam throughout. For a full-size bag, the stay-stitching should be at 3/8", not 1/4" from the edge.
2) I'm using the lining trim print for the interior side of handles (exterior fabrics can be seen here).
3) I cut the pocket for this side of the lining about an inch shorter than the other one. These are deep pockets, and I thought having one side a bit shallower might be useful. On the other side I added a line of stitching in the center to divide into two equal-sized pockets. On this side I moved that line to the side (it didn't show in the pic, so that's indicated by the bright yellow line), for one bigger and one smaller pocket.
On a full-size bag this larger pocket would probably be too big, and I'd most likely have dividing one side into two and the other side into three pockets.
4) I added a fake tag from a scrap of red fabric, purely for fun. I'd say I do this on everything I sew, but truth is I often forget. I'm glad I remembered this time, because it will make me happy each time I see it. Plus, sometimes it's useful to tell one side of a bag (or garment) from the other at a glance.
So that's where I'm at with this as of this morning. I might get to assembling the lining this afternoon, but that's not a sure thing. I'll show off the completed bag as soon as it's done.
Monday, January 3, 2011
Amy Butler Style Stitches Sew-Along
Like I need to start any more projects.
I already have the book, though, and love the Origami Bags (the only thing I've made from it so far). Without a sew-along there's little chance I'll do other than think about making more stuff from the book. So I'm in.
First, though, I need to stop by the fabric store and stock up on interfacing. Man, that Amy loves to pile on the interfacing. And fusible fleece. I'm out of that, too.
Biggest challenge: I want to make as many of these projects as possible from stash. Coordinating prints and linings included.
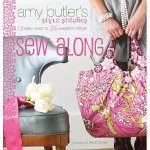
We're starting with the "Cosmo" bag (that's the one on the cover). Funny, 'cause Cosmo loves to crawl into any kind of open bag. If I'm smart, I'll choose a dark fabric for minimal cat-hair contrast.
I already have the book, though, and love the Origami Bags (the only thing I've made from it so far). Without a sew-along there's little chance I'll do other than think about making more stuff from the book. So I'm in.
First, though, I need to stop by the fabric store and stock up on interfacing. Man, that Amy loves to pile on the interfacing. And fusible fleece. I'm out of that, too.
Biggest challenge: I want to make as many of these projects as possible from stash. Coordinating prints and linings included.
We're starting with the "Cosmo" bag (that's the one on the cover). Funny, 'cause Cosmo loves to crawl into any kind of open bag. If I'm smart, I'll choose a dark fabric for minimal cat-hair contrast.
Subscribe to:
Posts (Atom)