Showing posts with label Jalie 2908. Show all posts

Saturday, October 2, 2010

my best friend: the seam ripper

Still waiting for that USB camera card reader. Online tracking says it left Honolulu yesterday, so should arrive in my PO Box today, but I've got too much to do to drive over to the other side of town to pick it up. Maybe I'll have some fresh pics for you on Monday afternoon? If I'm not too frantically trying to catch up on everything I have/want to do before departure for the east coast on Tuesday am.

Lots of sewing this week. A bit too much. I do best with short sewing sessions. When I keep going and going I am prone to stupid user errors. Like sewing the yoke onto my black stretch twill pants (Jalie 2908, wide legged version #2) backwards. A fixable error, but one I wish I'd noticed before I zigzag-finished the raw edges and added two rows of top-stitching. Oh well. It's all been picked apart and pressed back into shape, and as soon as I finish up here and get a little more caffeine in me I'll go put it back together again the right way.

I also produced an epic fail of Vogue 8323, the cowl-neck version:

It sewed up easily enough. I reduced the (ginormously long) cowl by half, by cutting on the "fold here" line, and stabilized the shoulder seams. But I wanted full-length sleeves, and when I tried it on the weight of the sleeves pulled the cowl neck sideways and that mid-shoulder princess seam ended up off the edge of my shoulder. The problem is that my fabric, although "light weight" as in thin and stretchy, is too "heavy" (as in weighty, not thick) for this style, and the wide cowl makes stabilizing the neck impossible. PR reviewers who've made this version have commented that a lightweight, droopy fabric (which mine is) is necessary for this view because a too-stable knit makes the cowl impossibly high and awkward.

I am very sorry I used some of my good fabric for this one. It might be possibly to save it: I'm thinking of, first, cutting the sleeve off to a minimal cap sleeve or, if that doesn't work, removing the sleeves entirely, and maybe taking an inch off each side of the cowl. I think without the sleeves it might be okay. It might even be better than okay. But sleeveless is not what I need to go in my suitcase, so any rescue operations on this one will have to wait until I get back from my trip. Unless a miracle happens and I end up with an hour or two of free time between now and Tuesday morning.
 
The bigger disappointment is that I had the cross-front version of this top (with sleeves added) in mind for another print in this same rayon jersey, and now I don't dare attempt it. I've had this fabric for a couple of years now, and want very much to make something with it, but finding the right pattern remains elusive. I may fall back on my TNT Santa Monica T, but had hoped to find something with a little more styling detail.
 
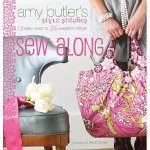
I've also made five (5!) "origami bag" zip pouches from Amy Butler's new book, Style Stitches: 12 Easy Ways to 26 Wonderful Bags
 
This book is GORGEOUS, one of the most beautifully photographed and designed books I've ever oogled over, and worth spending time with for eye candy fun even if you aren't much into bag sewing. The Origami bag is the only pattern from the book I've made so far, and is a nifty little design in six different sizes. I found a few parts of the instructions less than crystal clear the first time through, but having made one the rest were quick and easy. Several of mine are not to Amy's proportions, as I was working with pieces from the "large scraps" quilting drawer and using odds and ends of whatever bag-weight interfacing I could find. They all turned out great, though, and all the little crap I'm taking with me will now be sublimely organized.
 
Pics of these cuties will follow eventually. In the meantime, someone has posted a page-shot of the Origami Bag to Flickr here.

Sunday, September 26, 2010

buttonhole relevation

Oh, the joy and convenience of the one-step, push a button and watch it go, buttonhole function! My sewing projects are not buttonhole intensive, but when I've got one (or several) to do, I love that the machine does all the work for me, so almost-automatically.

My practice pair of jeans are this close to done. They still need to be hemmed. And they still need a buttonhole.

The test buttonhole was perfect (and so easy!), but when I set up to do the one on the waistband there was a snag. Literally. The back of the buttonhole foot -- which on my machine sticks out quite a way -- got hung up on the finished belt loop above the pocket, all forward motion of fabric under the needle ceased (just too much going on to fit under the b'hole foot, in spite of vigorous tugging and vocal encouragement from the machine operator) and I had to abort the mission.

Too bad I followed the Jalie assembly instructions so slavishly and slowly, making sure I'd completed each step before moving on to the next. If I'd left the beltloops unfinished (i.e., dangling from the bottom of the waistband, and not yet folded up and stitched into place), doing a keyhole buttonhole by machine woulda been a piece of cake.

Now I have to do the buttonhole by hand (snort: not hardly likely!). Or rip out a double row of tiny, narrow, zig-zag topstitching on the belt loop to make room for the machine to do its thing, and then redo it. Or make a plain buttonhole backwards -- with that pesky belt-loop in front of the presser foot during construction, instead of behind it --but I prefer a keyhole style for a shank button and am not quite ready to give up on it.

Any decision on how to proceed has been tabled until after lunch. My creative ingenuity, decision-making skills, and tolerance for fiddly little details all plummet when I'm hungry.

In the meantime, I've written a large correction to the instructions for next time: "Do the buttonhole BEFORE sewing that last belt loop into place!"

It's very possible that some helpful reviewer (or many of them) posted a comment about this somewhere on the several PR jeans threads or in the 71 Jalie 2908 reviews, but you could make several pairs of jeans in the time it would take to read through all of that info, so I've done no more than glance at it.

I've got a muslin of Butterick 5238 (knit top) ready to go, so I might take a break from the jeans and work on that this afternoon.

********
2PM update: the buttonhole is done. With 10 styles to choose from, I found one that is reinforced at the back, then sewed it in reversed position, so the reinforcement is at the zip end. Problem solved.

Saturday, September 25, 2010

Jeans progress and a fabric score

Stopped in at my LFS to get some kind of jeans-appropriate button(s) the other day and discovered they'd gotten a new shipment of "designer" remnants in. They have a large table of this stuff in the back, piles of flat-fold miscellany, often mostly crap, but some gems in there if you dig deep. Most pieces are 1-1.5 yards or so, some up to 3 yards, mix of wovens and knits, sometimes lace and other "novelty" items. You never know what you will find.

I found this:
Cotton-lycra jersey with some but not too much stretch. Due to camera issues, I scanned this in; about an 8"x10" sample of the 1-1/8 yard piece that I got for $3.76 inc. tax. It will become a top of some kind, don't know what yet. A bit on the hippy-dippy side, but I'm cool with that.

I also got 1-5/8 yards of the most luscious pewter-colored rayon stretch velvet you have ever seen. OMG is it yummy. A small splurge, at $12.20 for the piece, but whatever I make from it will be worth it.

Discount Fabric Warehouse consistently offers a world's-best collection of aloha prints and tropical barkcloth and upholstery fabrics at very reasonable prices, but their garment fabric selection is (for my needs and taste) mostly "miss." So when they get good stuff in I like to show my approval by handing over the AmEx. This time they had a TON of nice stuff, including many textured and embroidered silks/silk-imposters. I was tempted by many, but would have to change my entire lifestyle in support of that kind of wardrobe, so got out the door with only two additions to the stash. And a fistful of zippers in fun colors for future use.

In other news from the sewing room today, who knew that making jeans would be so much fun?! Okay, yes, many participants in the PR jeans sew-along have posted exactly that, but I didn't expect to be one of them. My hopes hovered at the level of getting through the process without bruising my forehead too badly banging it on the sewing table in expected bouts of despair and frustration. But seriously, folks, I'm having fun. Something about completing each step and holding it up and thinking, "hey, this is starting to look like real jeans" is irresistable. I still have to do the waistband and belt-loops, and (eeep) hems, but am already itching to start on a second pair.

Disclaimer: when I say I get a thrill from seeing my efforts morph into something that looks like "real jeans," I am taking some liberties with language. Especially when applied to my top-stitching, which is, um, not at all professional looking. It's downright wonky in more than a few places, at least two of which can be blamed on Cosmo, who is fascinated by the sewing machine and prone to leaping onto the sewing table in pursuit of moving parts at inopportune moments.

Here's a peek at my lined waistband (in progress) and belt-loops strips (also a bit wonky). Not that I care: my pleasure in producing something that looks (to my starry eyes) like "real jeans" is completely outweighing any pride in craftsmanship, or lack thereof:


I've used my various-sized scraps of this Amy Butler print for so many different projects now that I've almost used it up. The pockets are this print on one side, and a different, coodinating one on the other because I didn't have any large enough pieces left to make complete pockets.

By using the scanner today I got a nice, sharp, high-res image of the weird, two-wrong-side fabric I mentioned previously, so here's a closeup of that:
This fabric is so stretchy across the grain that I didn't dare cut the waistband on the bias as the pattern calls for. This is a lengthwise strip: that ridged texture runs across the width of the fabric, rather than vertically as you see it here. I'm actually on the verge of liking it.


Friday, September 24, 2010

Inaccessible...

... my photos, that is. I got a new USB cable for the digital camera and tried it out this morning. Alas, the camera is still invisible to my computer. Which means the problem is inside the camera somewhere. I don't know if it's the kind of thing that can be fixed, and if so at what expense. I'm going to turn the problem over to Mr. de Hilo, who is in charge of all technical details around here. Perhaps he can come up with a solution. Probably it will be easier/cheaper to just get a new camera.

Too bad we're closing in on the end of the month. I've spent way too much already on fabric, cat toys (and food, and litter) and have two more vet bills to pay before little cutie's vaccinations are complete and he's been neutered. And next month I'm travelling for two weeks, with many fabric store visits planned, plus other incidentals, including hotel rooms and meals for the several nights I won't be at Mom and Dad's. And then there's XMas to shop for (yes I'll make some things, but the AmEx will get into play, too). So I don't see where there's any new camera in my budget. Maybe if I ask Santa for one.

In the meantime, I took some pics this morning of my custom-jeans-pocket stitching and my clever lined belt-loops strips. The belt loops are the sort of fiddly little detail that is really not worth doing and a lousy use of my sewing time, but I couldn't help myself once the idea popped into my head.

Since pics are still in the inaccessible, I'll try to entertain you with my pocket-stitching line drawing. The outer line is the cut size of the pocket piece, with inner top-stitching line also marked:


I made this up to size in Illustrator (that's an "Americana" font capital V, converted to outline), flipped the arcs but not the V for the other side, printed them both out, pinned the paper to the pocket fabric and stitched right through the paper. Slowly. Very slowly.

Worked great, after I'd spent about 90 minutes fussing around with every possible top-stitching/bobbin thread combination, several different needles, and every tension setting on my machine, before arriving at a workable combination.

Anyhoo, so far so good on the jeans. If I could retrieve photos from my camera you'd see how laughably un-professional my top-stitching is. Not that I care. I consider these a practice pair, although if they turn out to be comfy I'll wear them anyway.

I need to do some "real work" for a bit, then I tackle the fly-front zip install.

Saturday, September 18, 2010

two wrong sides?

Couldn't capture this in a photo, but perhaps you've encoutered something similar: a fabric with two wrong sides.

I'm muslining the Jalie 2908 stretch jeans in a too-stretchy something I picked up for 1.99 to test the pattern with. It's an icky pale blue, light-denim weight but not a twill; the weave on one side looks exactly like the "wrong" side of real denim. The other side looks exactly like the wrong side of something else. What, I don't know.

While cutting the fabric I changed my mind several times as to which side was the "right" side, and finally decided there wasn't one. I picked a side and decided to go with that. Today, basting up front/back for a quick try-on, I went the other way.

Not that it matters. One glance in the mirror was enough to convince me that light-colored stretch anything is not a good choice on my butt, especially in a jeans fit. Unless I wear a tunic over it, which is a possibility. I wasn't going to stay in them long enough to find out, though, as it's too hot in the sewing room for trying on pants for more than a nanosecond.

I wish I'd remembered to cut the muslin with extra-wide side seams. "Boot cut" and I are not friends, so I straightened out the taper, adding some width at the knee and bringing in the flare to a straight line. The end result would be fine if I were slimmer through the hips, but as things are now the narrow leg makes my wide parts look even wider.

On the whole, though, not bad for a first muslin. I'm already thinking these could be cute at capri length, under a tunic. If nothing else, it might be worth finishing these pants for those days when I don't feel like working out. I could put them on instead of my exercise clothes and admire my rear view for a dose of instant inspiration.

Speaking of pants, I finally got the Marrakesh pants pinned for hemming. It took about six tries, spread out over ... how long has it been? 10 days? Felt like for-frickin'-ever. Anyway, as of this morning they are pinned and ready to hem. As soon as it cools off enough to plug in my iron I'll press them and try to remember how to use the blind-hem foot on my machine.

I've heard that every blog post needs a picture, so here's my little cutie enjoying one of his favorite toys. This box had one open end for pantry use, and when he became fascinated with it I cut a large hole in the other for greater play possibilities. He likes to "hide" in there (sticking out both ends) before pouncing.